Building my own skies
Published on Feb 06, 2025 by Impaktor.
In the days of darkness
men feared not the sword and the lance
Nor did he fear the beast of fire…
He feared…
T h e A x e m a n ! !
Omen - Battle Cry - The Axe man (1984)
Table of Contents
- 1. Introduction
- 2. Select material
- 3. Tools attack wood
- 3.1. Straighten the underside
- 3.2. Find the ski in the plank
- 3.3. Ax that which is not ski
- 3.4. “Straight edge”
- 3.5. Checkpoint 1: End of first afternoon
- 3.6. Profile / side
- 3.7. Make slope towards front & back of the ski’s tips
- 3.8. Few words on making the foot plate
- 3.9. Upper ridge / spine
- 3.10. Making the tip
- 3.11. Checkpoint 2: End of second afternoon
- 3.12. Making the back
- 3.13. Heating the tip
- 3.14. Bending the tip
- 4. Post bending
- 5. Tar and heat
- 6. Bindings
- 7. Lessons learned
- 8. Appendix
1. Introduction
I quit my job as senior data scientist / machine learning engineer, and moved to woods of northern Sweden.
Here be plenty of snow.
I’ve not skied since that one time as a kid +30 years ago…
If I’m to ski, I need a pair of skies.
Lets build skies!
…but with boundary condition:
Reject modernity — Embrace tradition.
Use only traditional tools (axe, saw, plane (swe: hyvel), chisel (swe: stämjärn), and a drawknife (swe: bandkniv)) and make a traditional wooden ski.
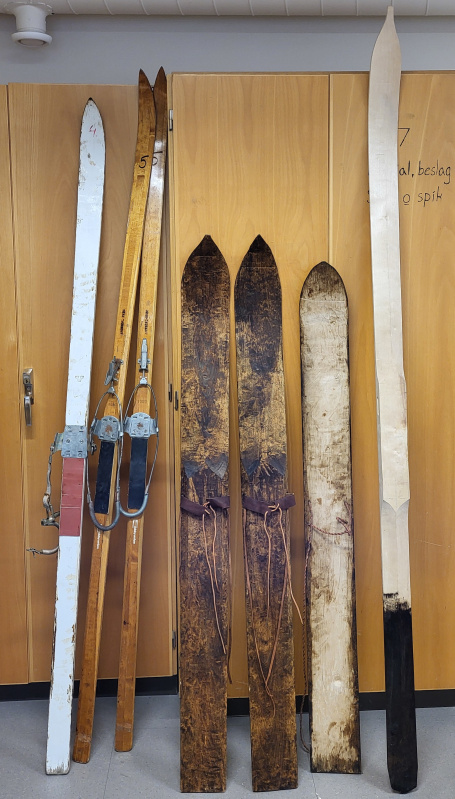
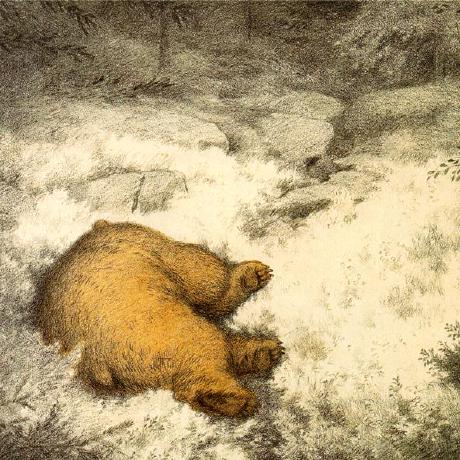
Figure 1: (Historic) Skies come in all shapes and forms
In the image above from left to right:
- “Vita blixten” (white lightning)
- Swedish army’s classic ski, used for close to a century by now.
- “Bruna spåret” (brown trail)
- An alternative thinner ski, lacking leather strap on top of the tip of the boot, making it finicky to use.
- “Fornnordisk”
- Historic ski several of this model have been found in the thawing snow in Scandinavia from 5000 years ago. The oldest ever found is Klavträskskidan, in Västerbotten (1923), Sweden. These used skin on the underside, which allows them to be used uphill without slipping back. Best skin is the leg of deer and horse, or otter and beaver skins.
- “Thin wood ski”
- Model in use from circa 1700-1900s, which is the one I’m modeling mine on.
The choice is between the Fornnordisk and the “thin/long” ones. I’m opting for the thinner ones.
Interestingly, skiing was unknown in the Alps well until 1800s, and only gained popularity from Fridtjof Nansen’s classic “På ski over Grønland”. In North America skies were first introduced in 1800s, by Scandinavian immigrants, and came to be called “Norwegian snow shoes”.
2. Select material
2.1. Wood type
I’m using a plank from pine tree of dimensions 15 cm x 1.5 inch x 4 meters. Other wood types for making skies:
- Pine Tree (swe: fura)
- Light and easy to work with. Low density makes it good for longer skies. Works well on powder snow, but might get worn by frozen snow (swe: skare), edges might get worn down and rounded by such conditions.
- Birch (swe: björk)
- Stronger and denser. Note: Birch has more lignin (glue substance) closer to the root, thus use this part as the front part of the ski, as the ligin will help preserve the up-bend of the front.
- Aspen (swe: asp)
- Similar to birch.
2.2. Select plank
I’m selecting a plank free of knots (swe: kvistar) or resin (swe: kåda), as the former will especially be troublesome in the front where we bend the wood up, and the latter is unnecessarily difficult when we plane (swe: hyvlar) the plank.
I select one which doesn’t twist too much, and that has an arch that I designate as the down side.

Figure 2: The direction of the arch’s bend (red arrow) indicates left side is underside, right side is top. Direction of fiber (orange marks) shows the trunk has been split into planks like cheese slicing. I’ll return to this further down.
2.3. Measurements
Length of the ski is approximate, if you’re heavy, carrying heavy backpack or plan to go on lofty snow, you can add length, and vice versa if light.
- For an old Scandinavian “fornnordisk” ski, the length should your body length (feet to top of head). Width can be about the full 15 cm width of the plank.
- For the thin skies, the length should be that which you can hold up with one arm stretched high. I’m opting for this, thus my \(L=2.35\) meters.
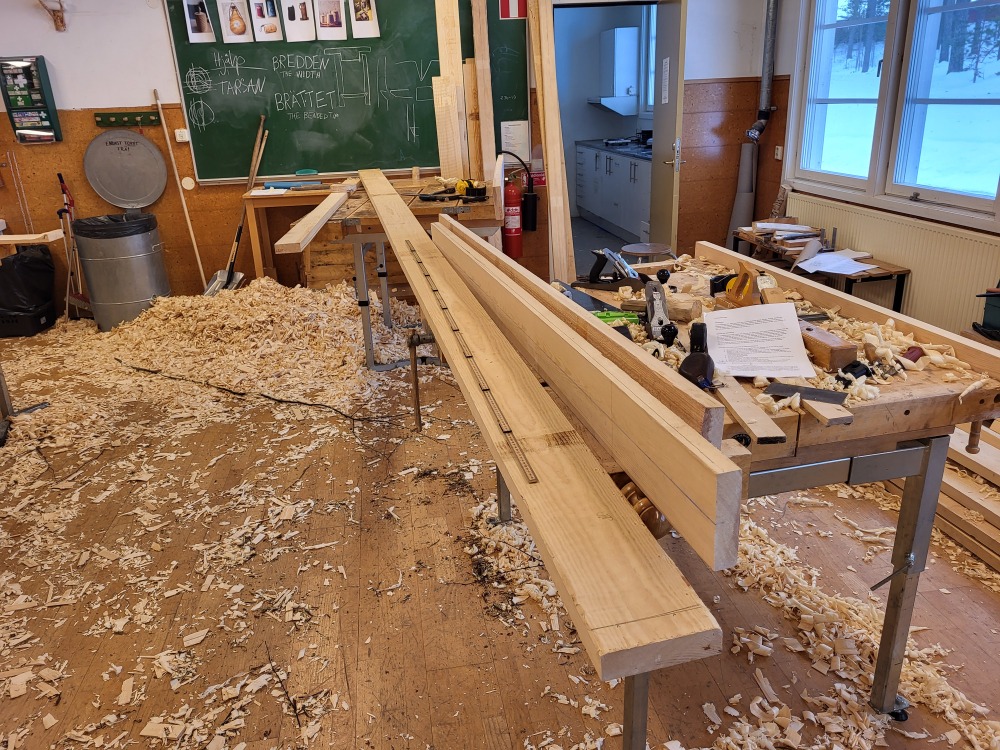
Figure 3: I measure 235 cm + ca 5 cm in each end as margin
3. Tools attack wood
3.1. Straighten the underside
First step is to make it level and straight, i.e. remove any “propeller” tendency. Use two sticks to “guide the eye” to better see the twisting.
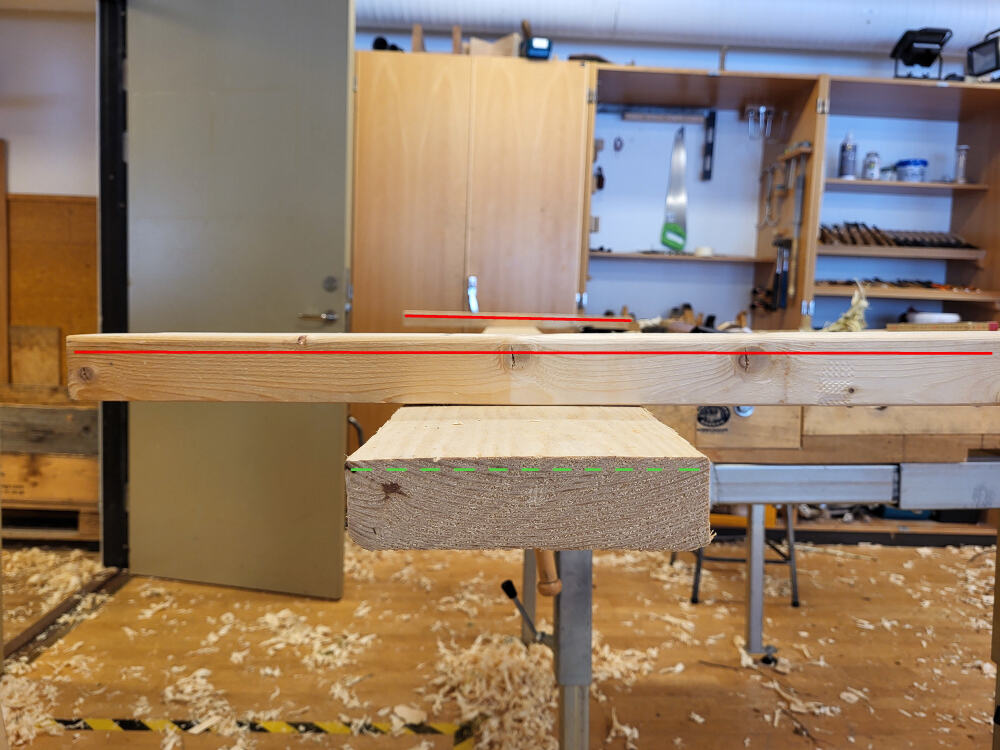
Figure 4: Red lines indicate propeller-twist, green for level
3.2. Find the ski in the plank
I use chalk line(?) (swe: kritsnöre or snörslå) get the center line. From this I draw the edges such that the top is 9.5 cm and the bottom is 8 cm, numbers I took from measuring another finished demonstrator ski.
(Confession: I had intended the bottom to be 8.5 cm, but the saw was hungrily gobbling up a bit too much on the other ski, thus for symmetry’s sake both became 8 cm).
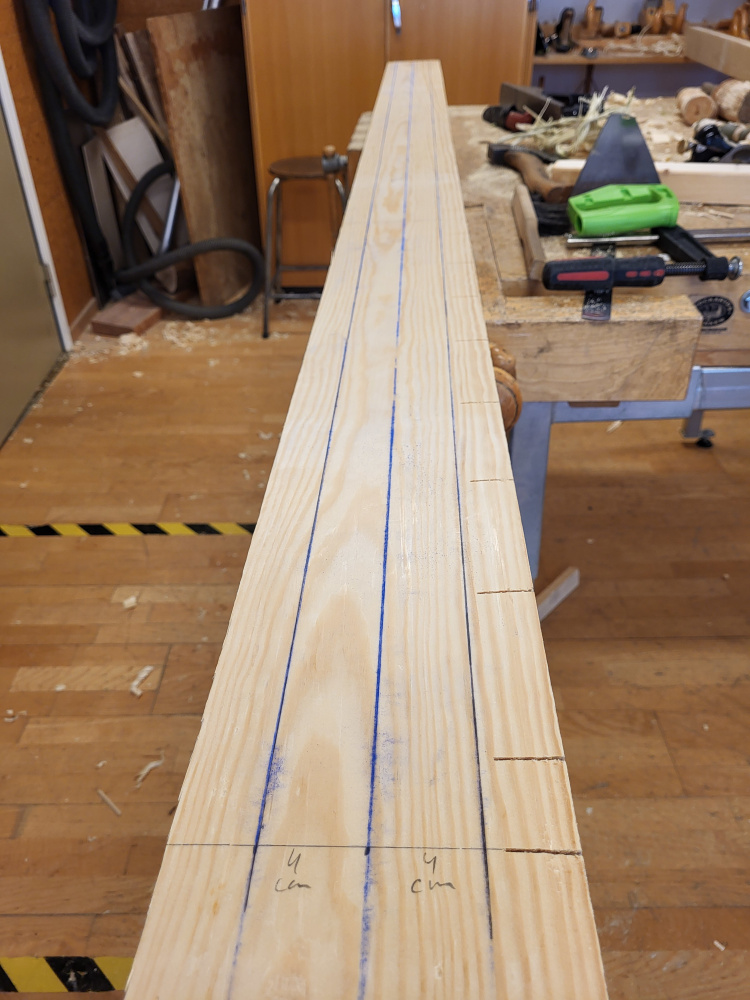
Figure 5: Underside is now flat. Blue chalk line defines middle and edges.
While I have the ruler out, I measure up the position of the center line of the foot’s position. It should be at the center of mass of the ski, or slightly in front, such that the ski tip tips up, and the back tips down. Caveat: I do not yet know the exact position, but a good rule of thumb is \(L/2.3\) measured from the back, i.e. in my case 235 cm / 2.3 = 102 cm.
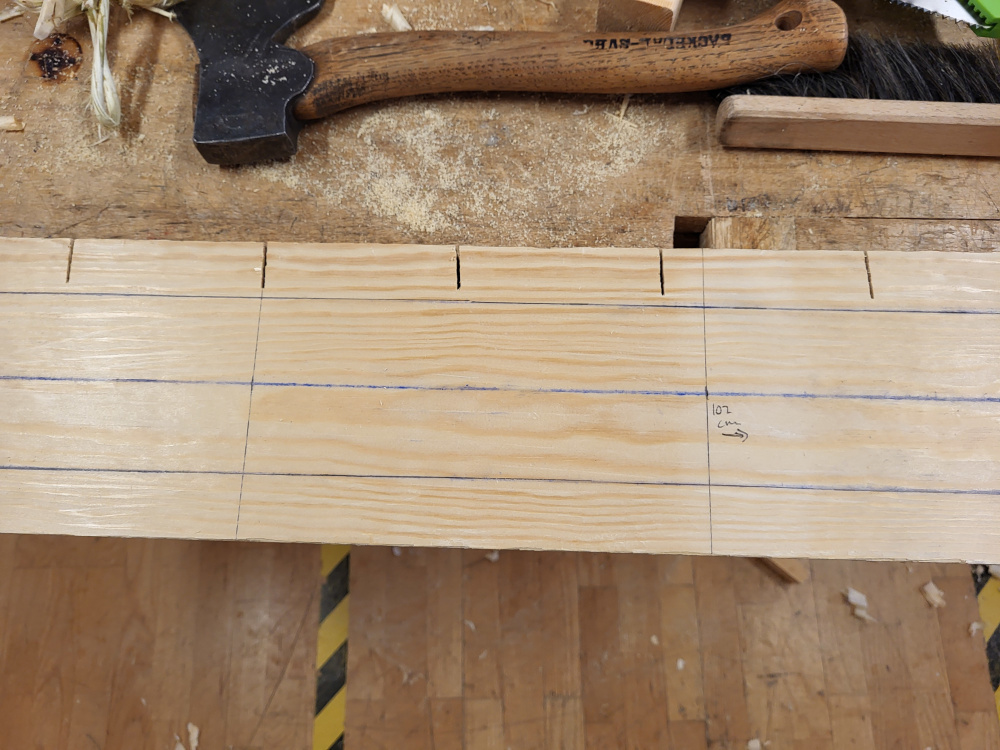
Figure 6: Marked the center foot poistion as 102 cm from the back; and sawed into the “dead wood” to be (literally) axed
I saw into the wood to be axed, and stop about 2 mm from the edge line of the ski to be. I note the saw was very hungry indeed.
3.3. Ax that which is not ski
Use the ax, followed by drawknife, to remove all “not-ski” wood. Remember to sharpen to ax and drawknife. Before I start removing that which is not ski, sharpen the tools.
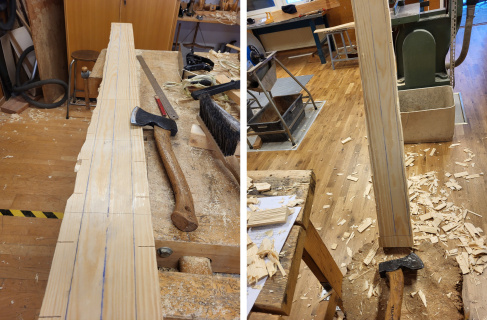
Figure 7: (Left) The saw guides the ax to not dig into the ski, but splinter out the wood to be removed. (Right) Easiest position is to work with the ski at high angle to the floor
3.4. “Straight edge”
Next I need only make straight edge, using drawknife (peels of chunks of fiber at a dangerously greedy rate).
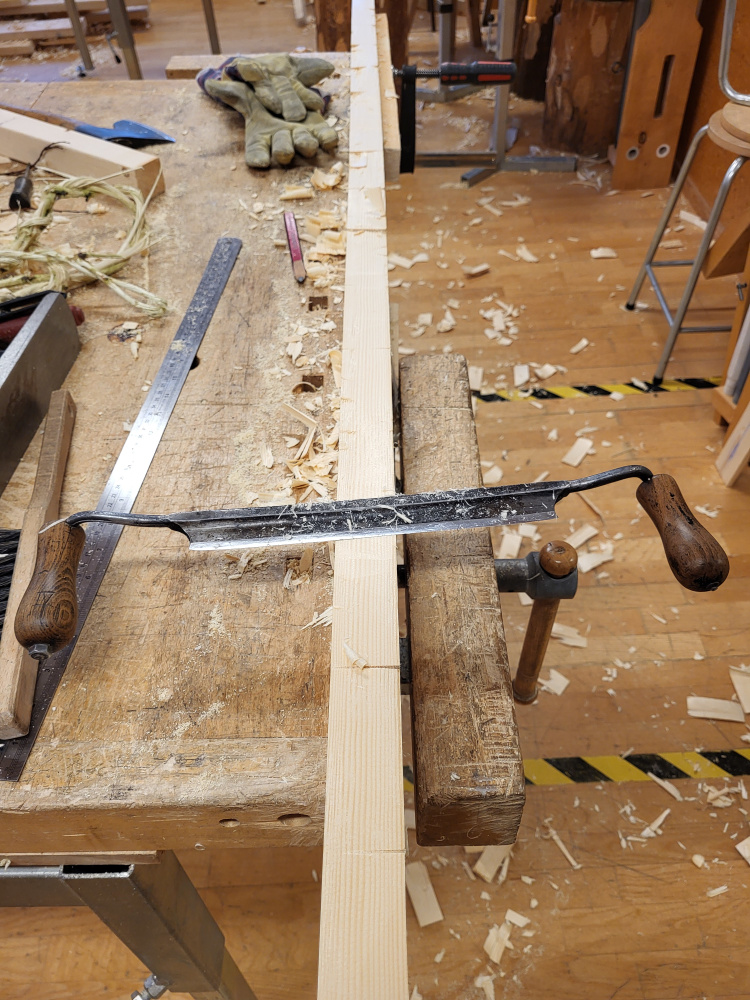
Figure 8: Once we’re past the saw marks, tread carefully
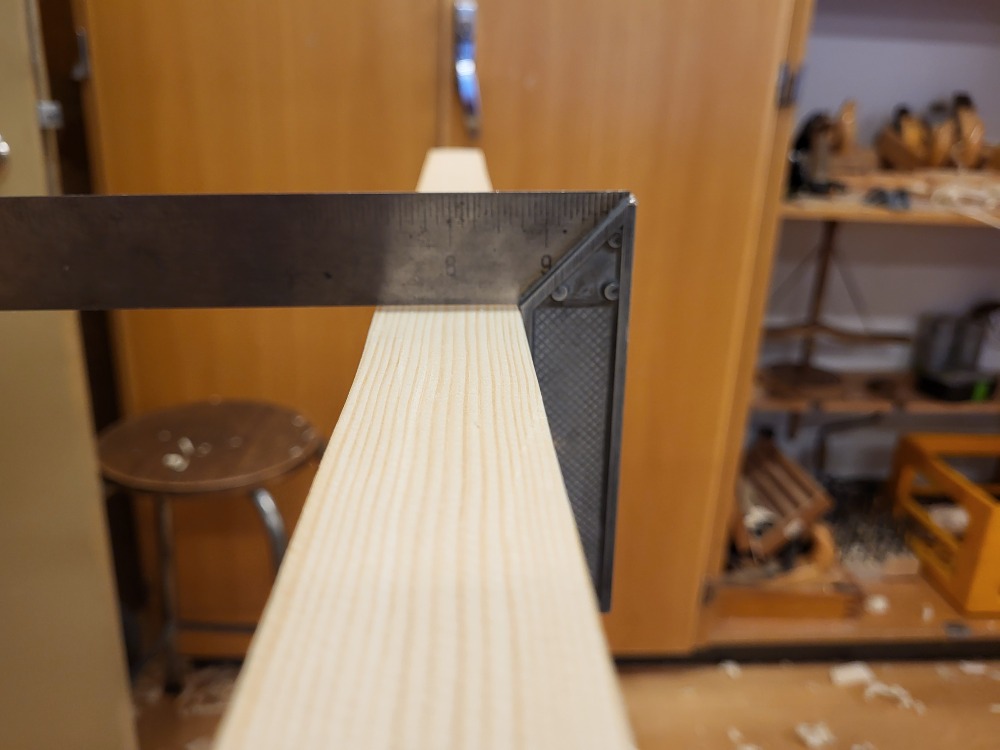
Figure 9: Straight edge (-ish). We want 90 degree angle, useful when we make sharp turns when skiing.
3.5. Checkpoint 1: End of first afternoon
I started selecting my plank at a quarter to one (12:45), now it’s 16:00, time to go home.
Tomorrow I’ll plane the other side, and do the top.
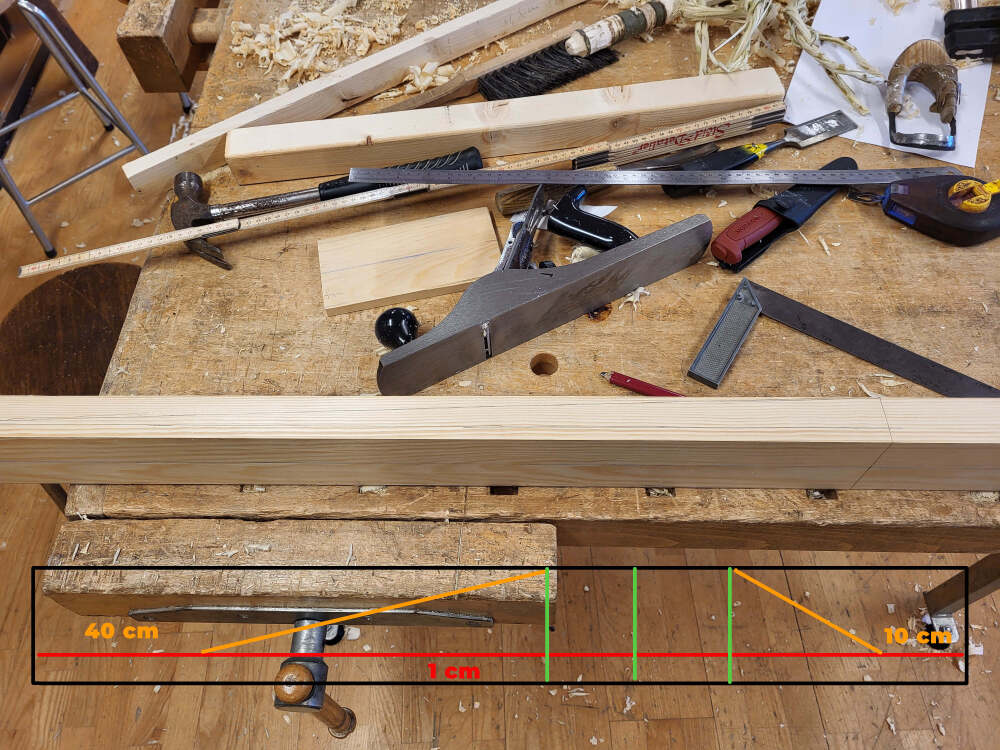
3.6. Profile / side
With the sides done, we now draw the profile as seen from the side:
- Thickness (red): Draw a 1 cm long line along the ski, as measured from the underside. This will indicate the thickness of the ski.
- Slope forward (orange): from the top of the footplate (green) to 35 cm - 40 cm from the tip, draw a diagonal line to the “thickness line”
- Slope backwards (orange): As previous step, but terminate 10 cm from the end tip.
3.7. Make slope towards front & back of the ski’s tips
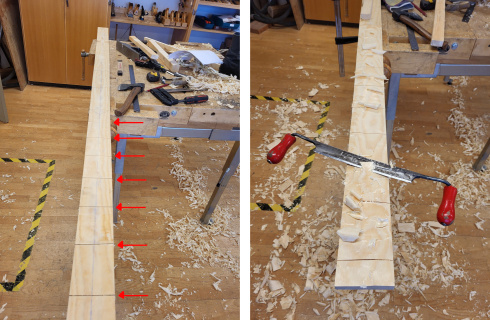
Figure 11: Left: Every ~10 cm saw down to the diagonal (“orange” in figure 10) line. Right: After axing, use drawknife to make planing (swe: hyvla) easier.
3.8. Few words on making the foot plate
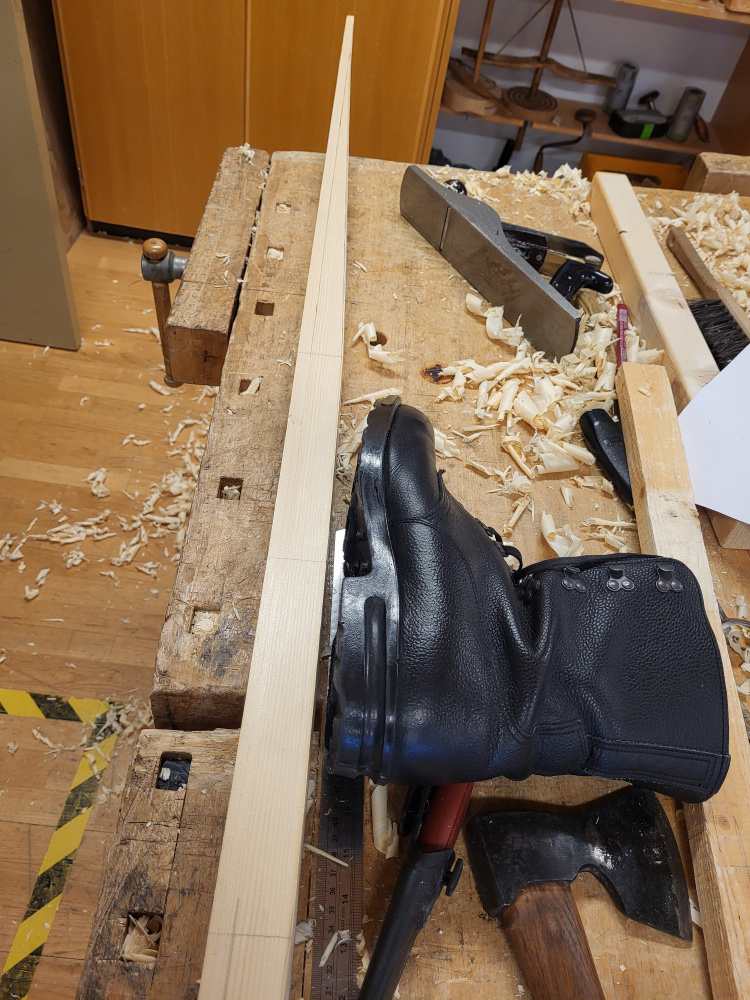
Figure 12: Planing is done, and we have the slope of the ridge
I’ve neglected talking about the measurements of the foot plate. I’ve measured my boots to be 34 cm of length (EU size 48). To this I’ve added 5 cm on each side, thus the full footplate is 22 cm on either side of the guessed center of mass line I made before (102 cm from back).
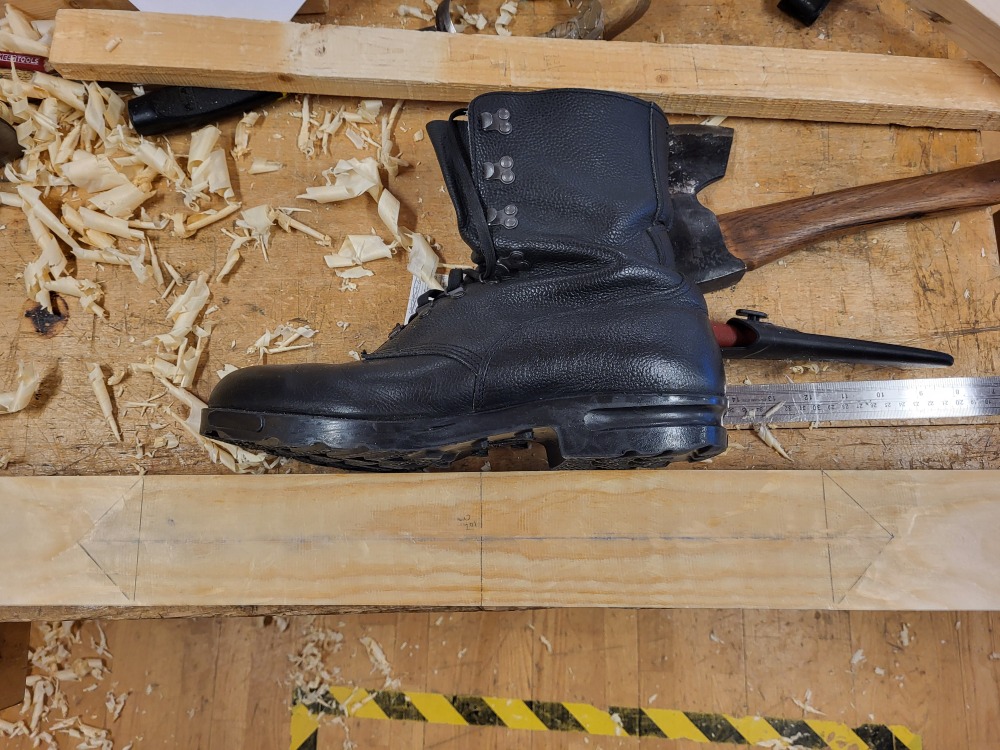
Figure 13: Boot is 34 cm (EU size 48), full footplate is 44 cm.
3.9. Upper ridge / spine
Again we saw & axe the “not-ski” part, but we now want to preserve the center part as the spine of the ski.
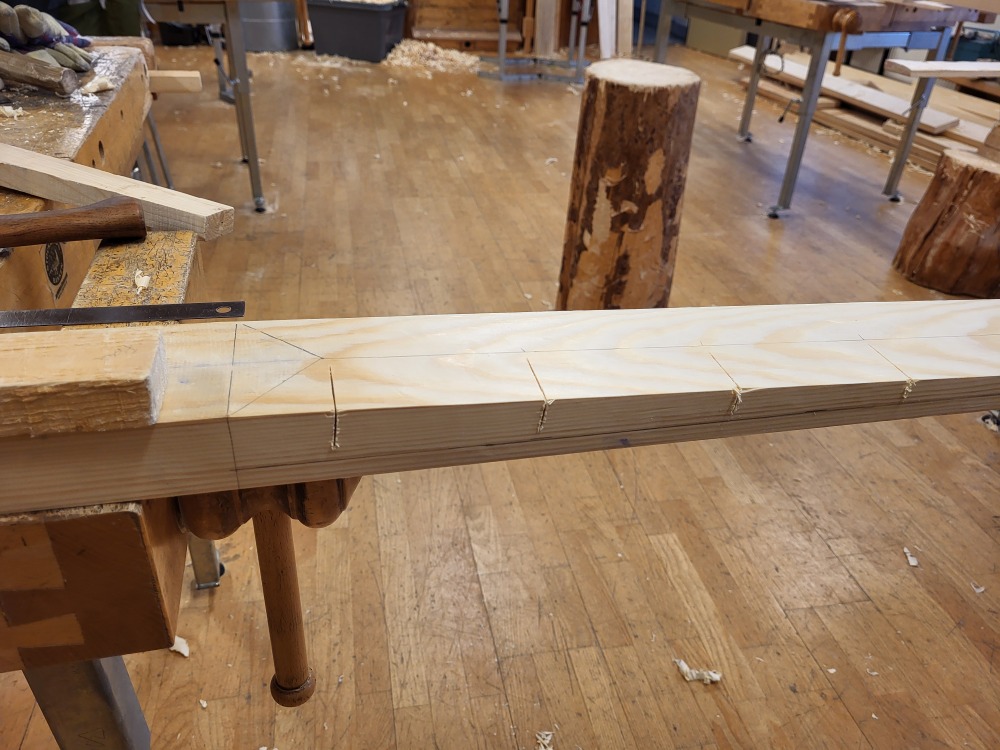
Figure 14: Saw diagonal cuts, then use axe and chisel to enforce your will.
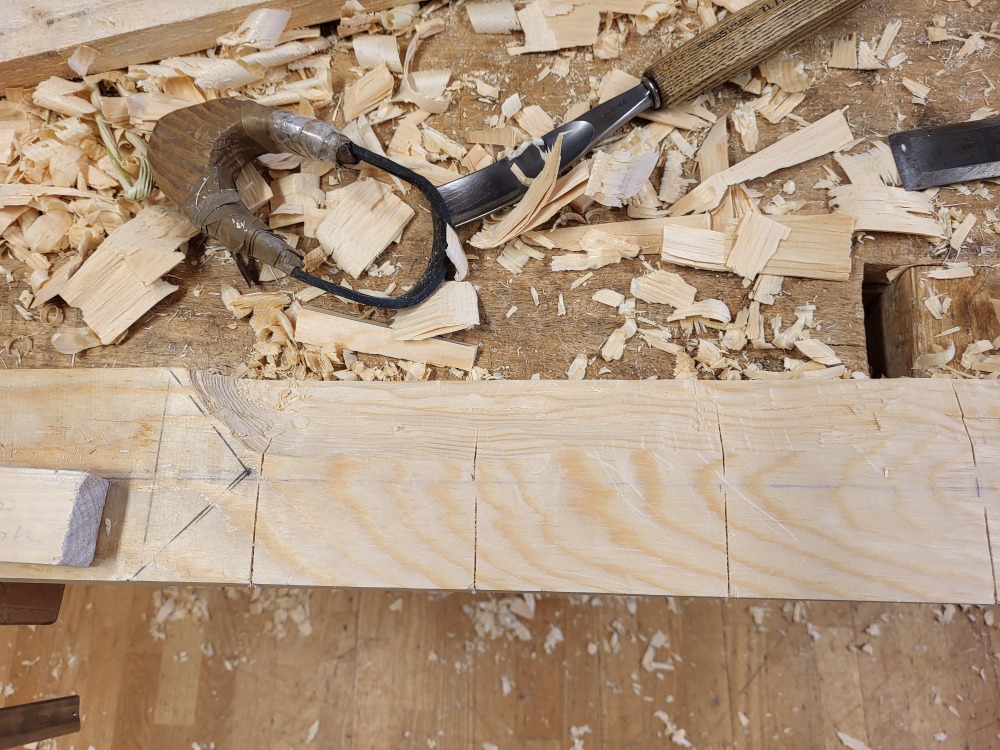
Figure 15: Note: saw cuts do not cross the center line
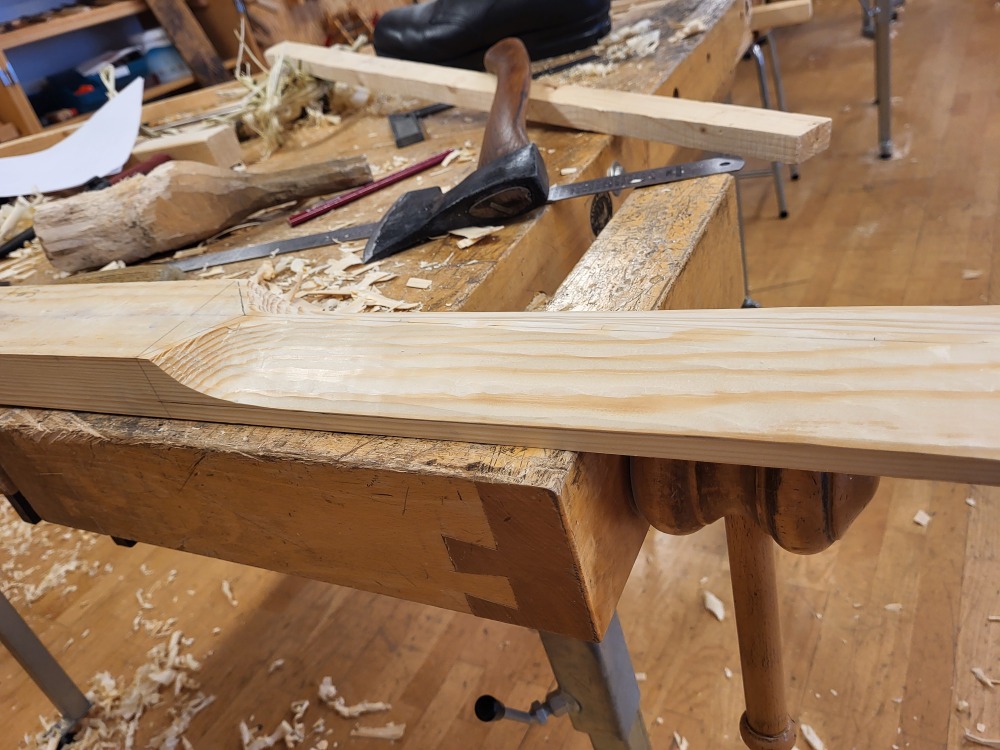
3.10. Making the tip
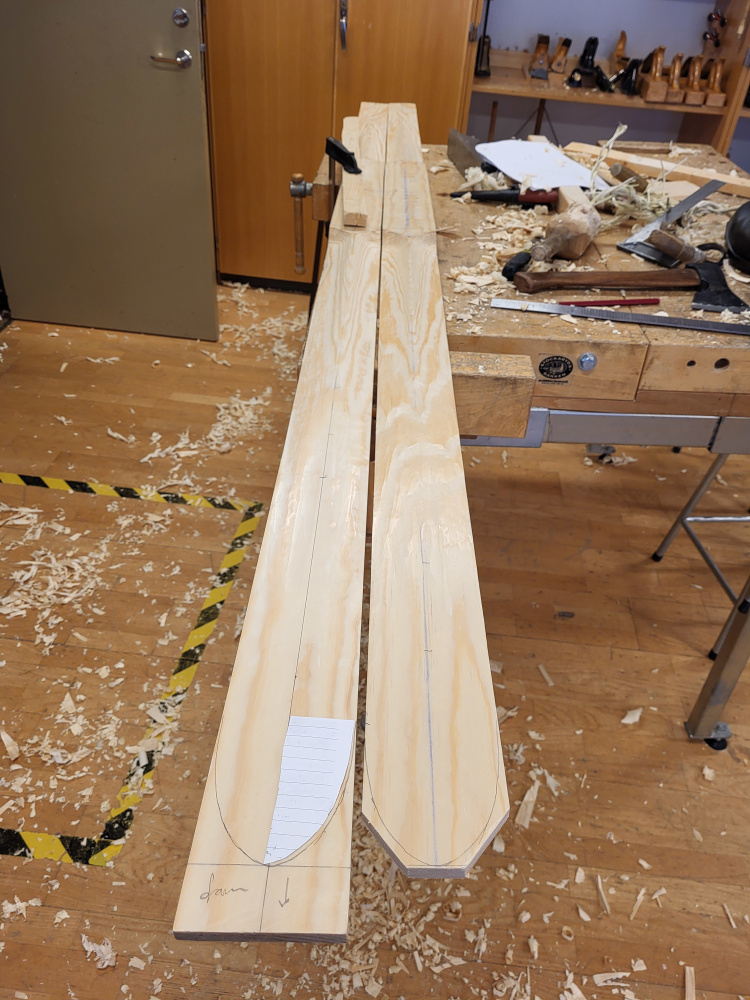
Figure 17: Use (half) a cut-out to get a symmetric tip
3.11. Checkpoint 2: End of second afternoon
At this point I’ve spent another 3-4 hours, on one ski.
3.12. Making the back
Made two lines, 1.5 cm and 6.5 cm from the end, from which lines at two different angles finish off the skies end section.
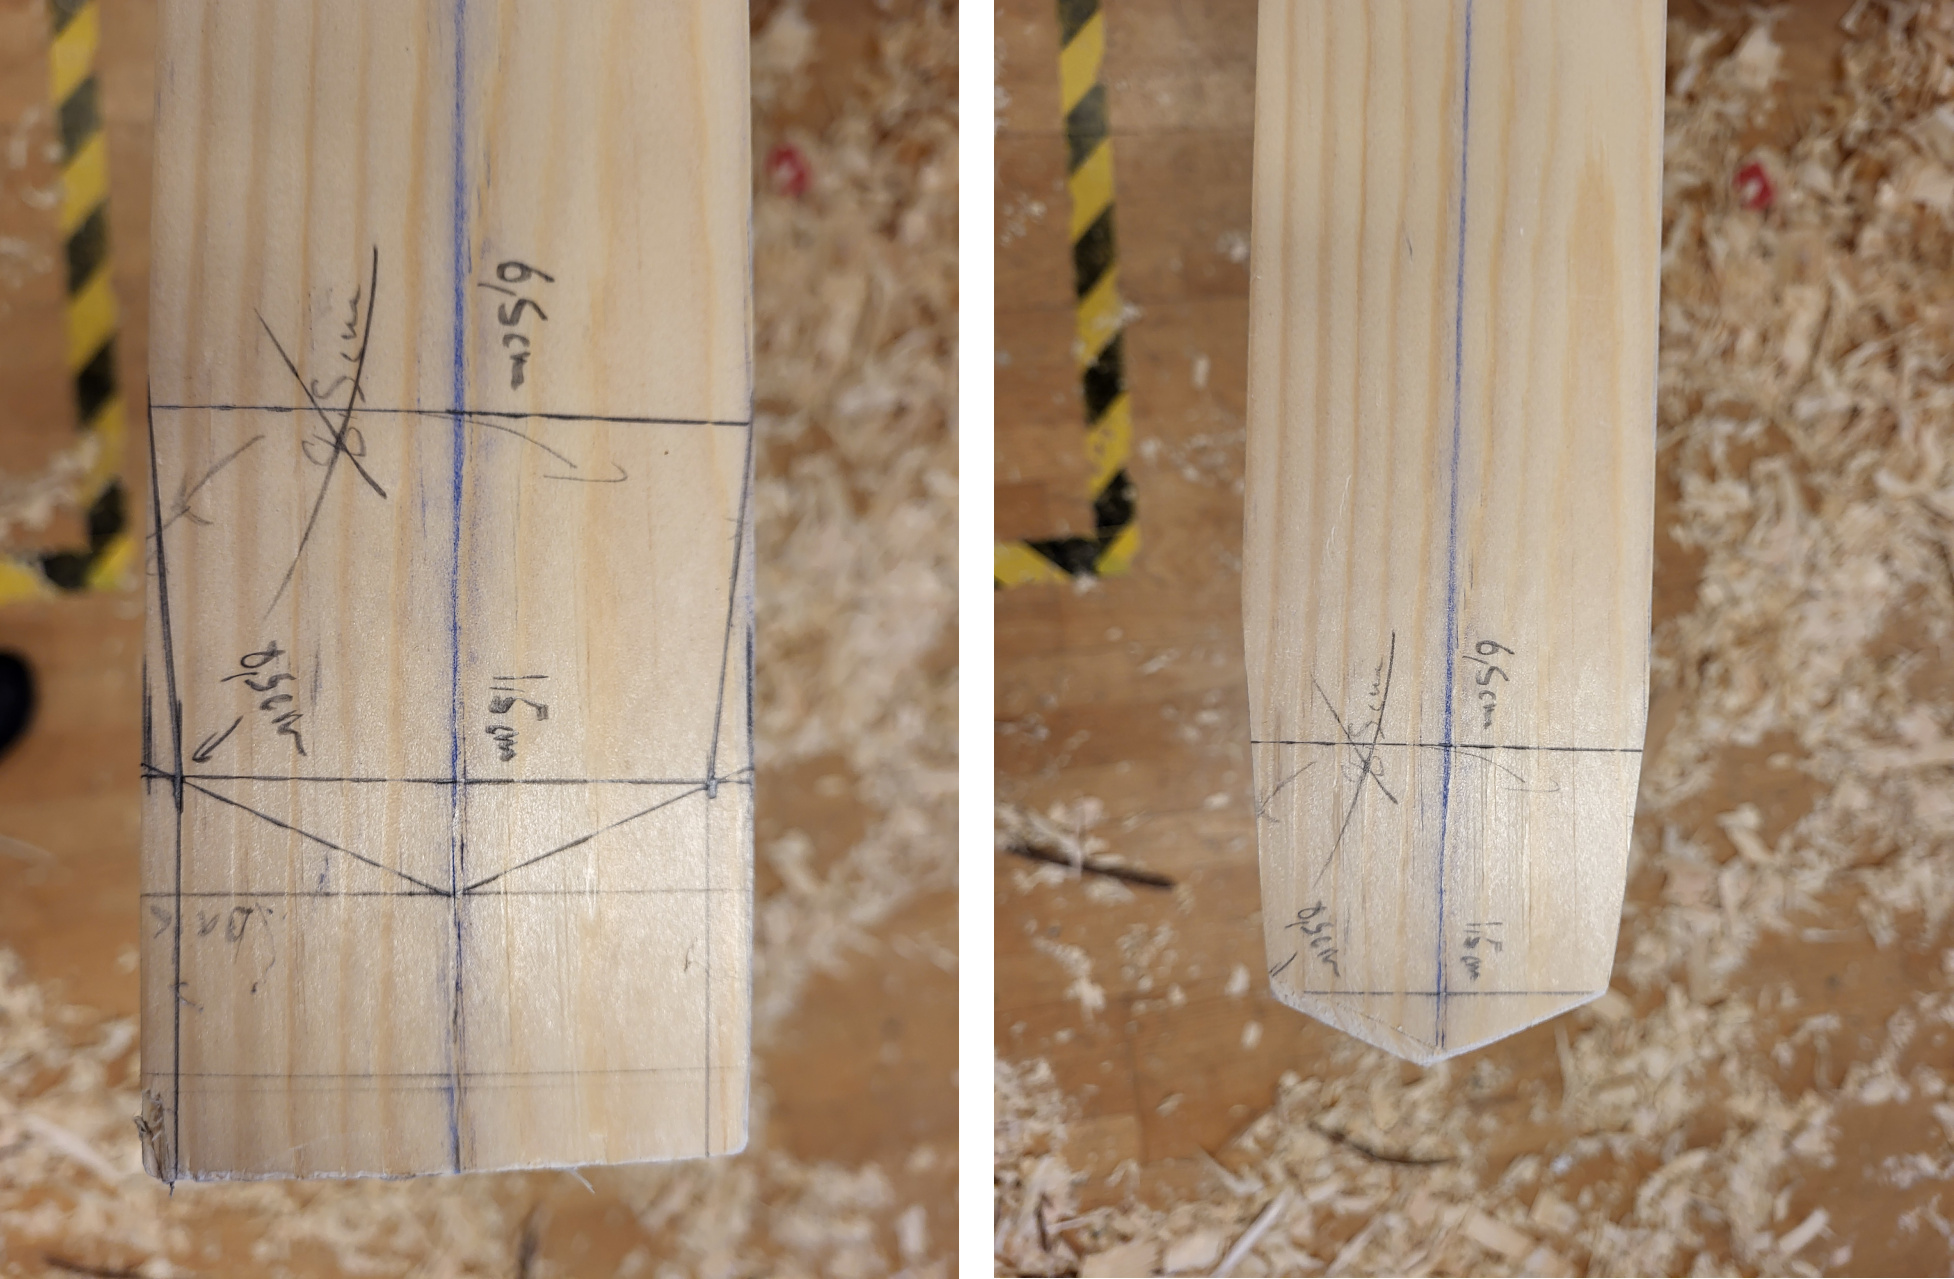
Figure 18: Before and after.
3.13. Heating the tip
For bending the tip we heat the wood for the glue (lignin) to soften up the wood. Usually 1 hour in a steam box will suffice, however our steam box is missing a lid, and has been warped some:
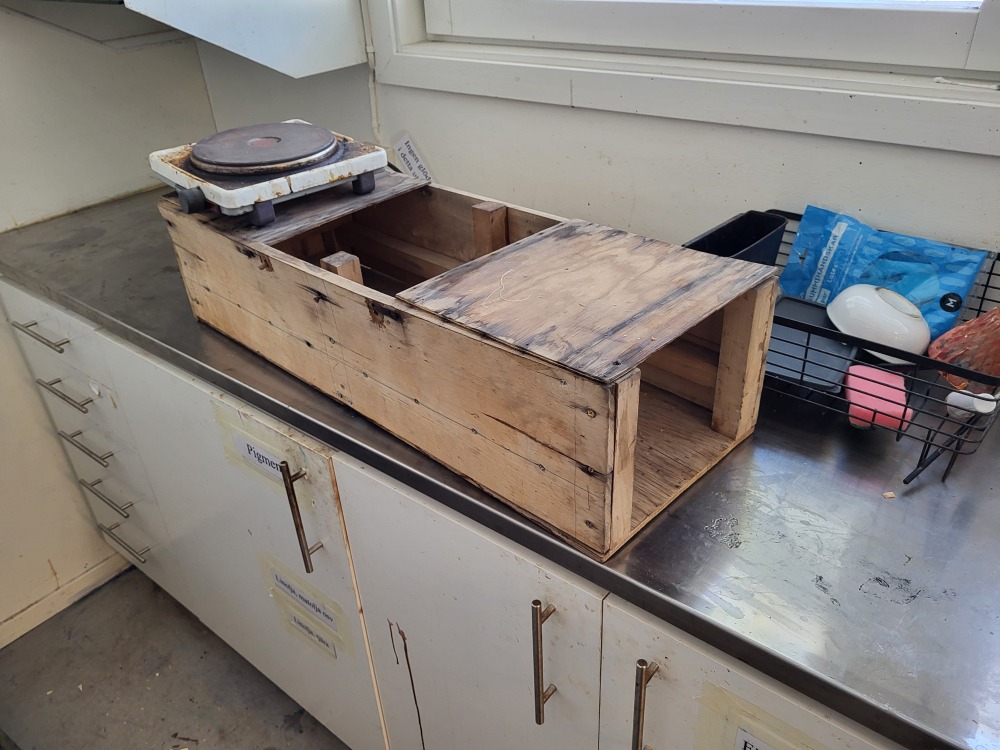
Figure 19: Stem box - heat plate + boiling kettle is placed underneath, and skies inserted from the side, and sealed with e.g. towels and rags.
Therefore, the leather tanning shop let me graciously borrow their giant kettle (originally an Electrolux machine repurposed from the kitchen). Since boiling water isn’t as hot as steam, I left them in for 2 hours.
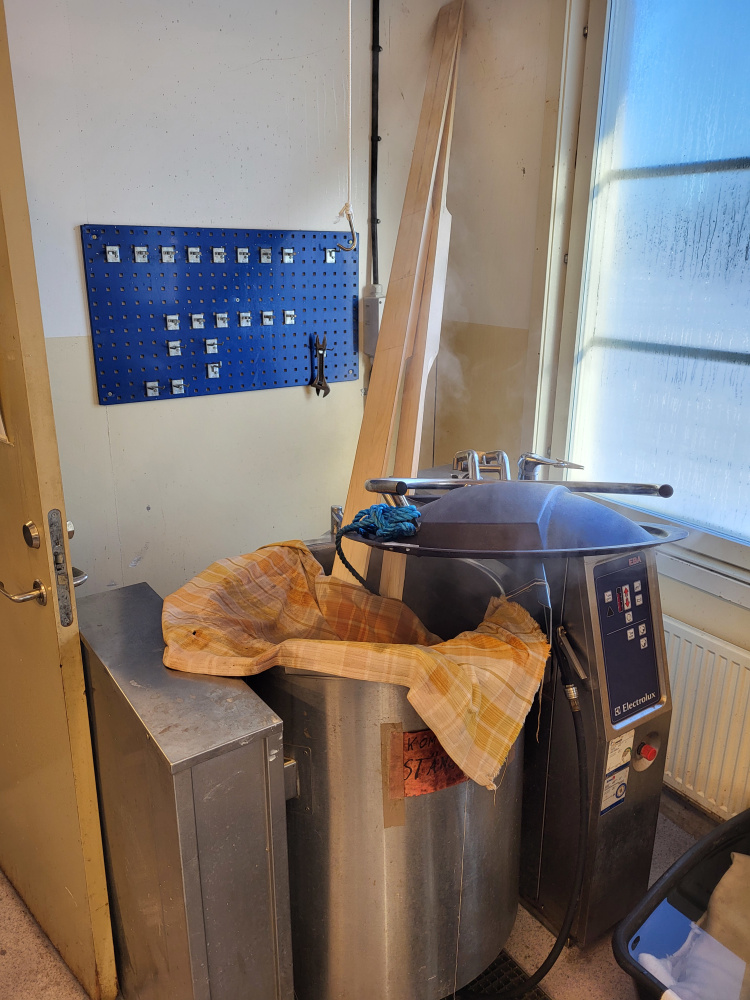
Figure 20: Using the kettle from the leather tanning shop
3.14. Bending the tip
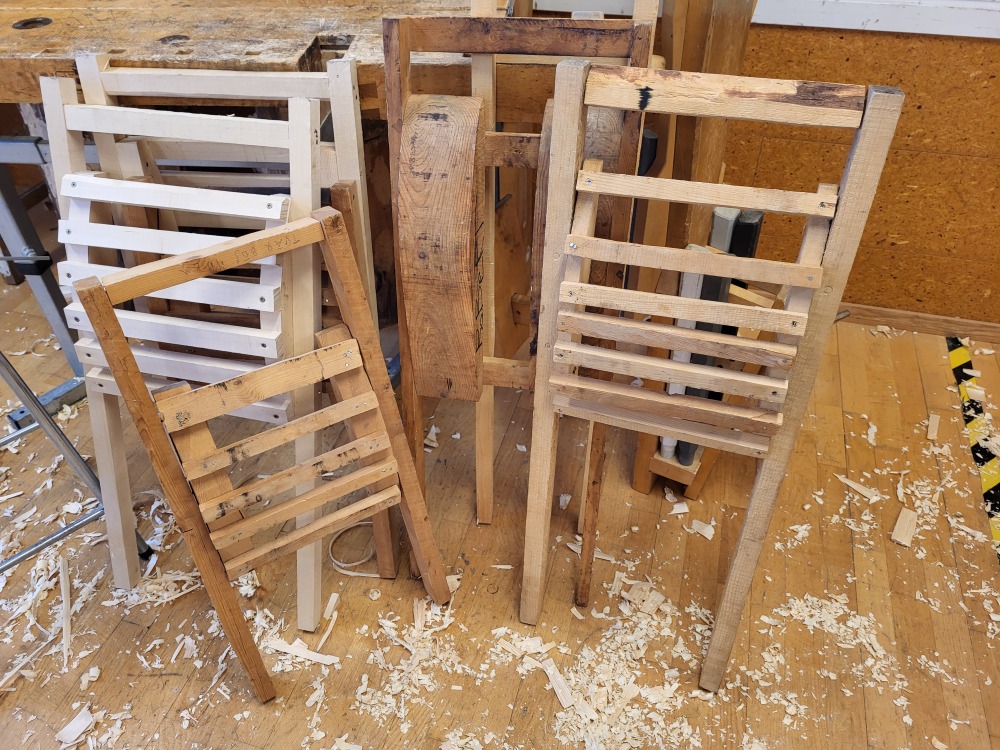
Figure 21: Many different shapes to use for the skies

Figure 22: Skies are fixated in the press for 24 h
(When bending, place the hand on the stress point of the ski, to feel if it starts to make sounds it should not make)
4. Post bending
4.1. Result of bending
24 hours later, the skies retain the new bent shape. However, there are now marks on the top from the rungs of the “ladder” and cracks underneath one of the ski pairs. The cracks are in the direction of the fibers, so it should be fine to use these, and the tar will fill them in.
Figure 23: There were sharp creases on the top, and cracks underneath
Why cracks? Some explanations might be:
- Pine dries too fast, and unevenly, and
- radial cut planks would have alleviated this effect - i.e. fibers 90 degrees rotated in the plank, which you get if slicing the log like a pie, rather than a cheese.
- Using steam would have been better because:
- higher temperature
- no water that disolves the lignin in the wood.
4.2. Steering track
To avoid the “Bambi on ice” effect, I make a steering track. I used a chisel, but (swe) skölpkniv might work just as well.
I make this after the bending, since now I know how far out the steering track should go, as only the flat part that makes contact with the ground need have it.
Figure 24: Steering track on the bottom
4.3. Provision for storage
In order to store it properly, I drill a hope in the tip (roughly 3-4 cm from the tip), and make a stick that fits between the holes of the ski pair.
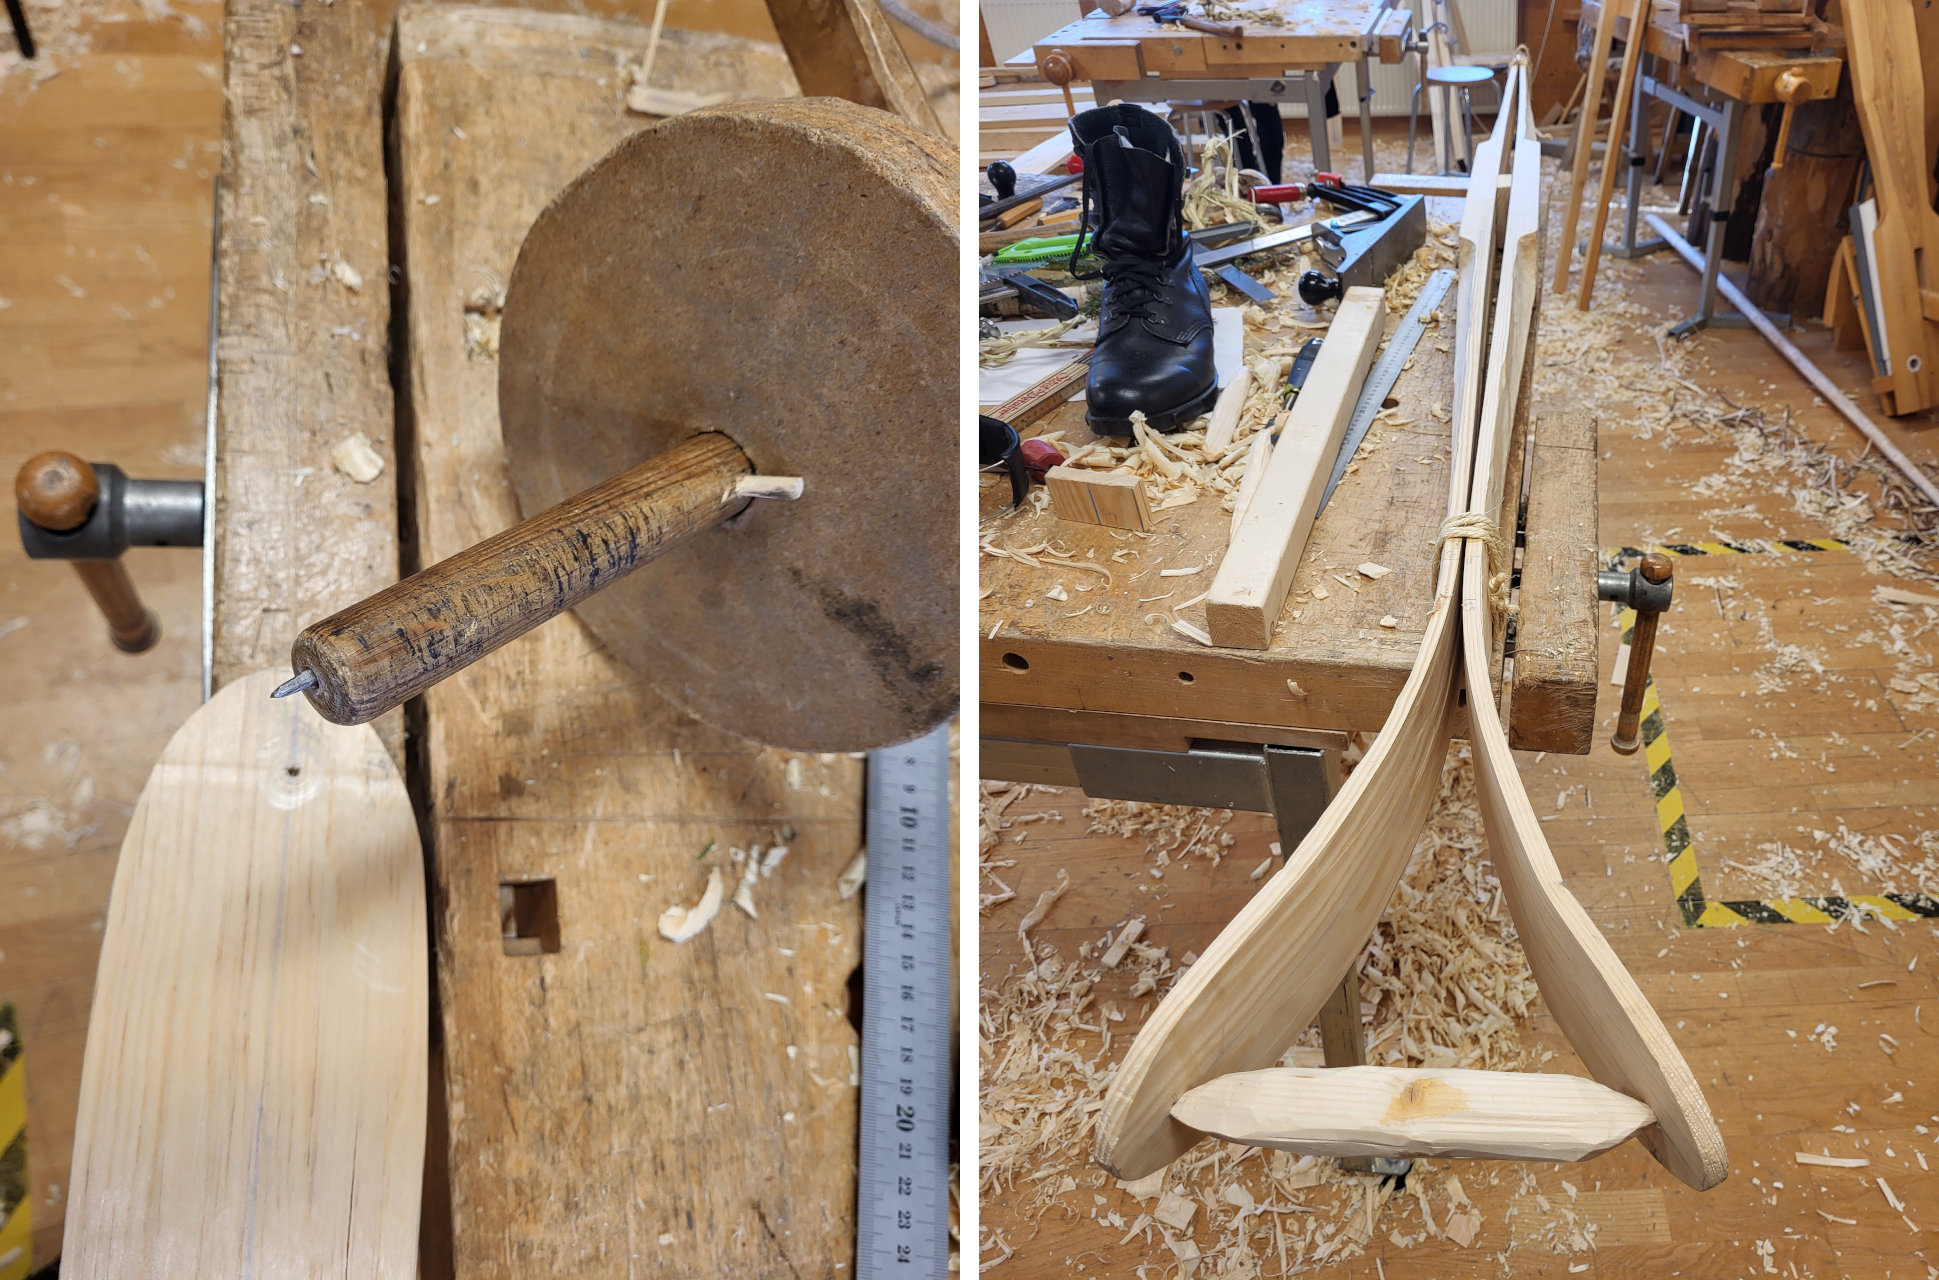
Figure 25: (Left) Drill a hole close to the tip for storing (right). Note the wood block in the center maintaining the concave shape of the original plank.
4.4. Provision for binding
Now that the tip is bent, I find the center of mass (c.o.m.), through my own little contraption consisting of a steel ruler. I want the toe to be the pivot point, and the skies to be slightly back heavy, such that the tip goes up in each stride.
Ideally, the c.o.m should be the same on both skies. I spent some time removing some more wood at well chosen places to this effect.
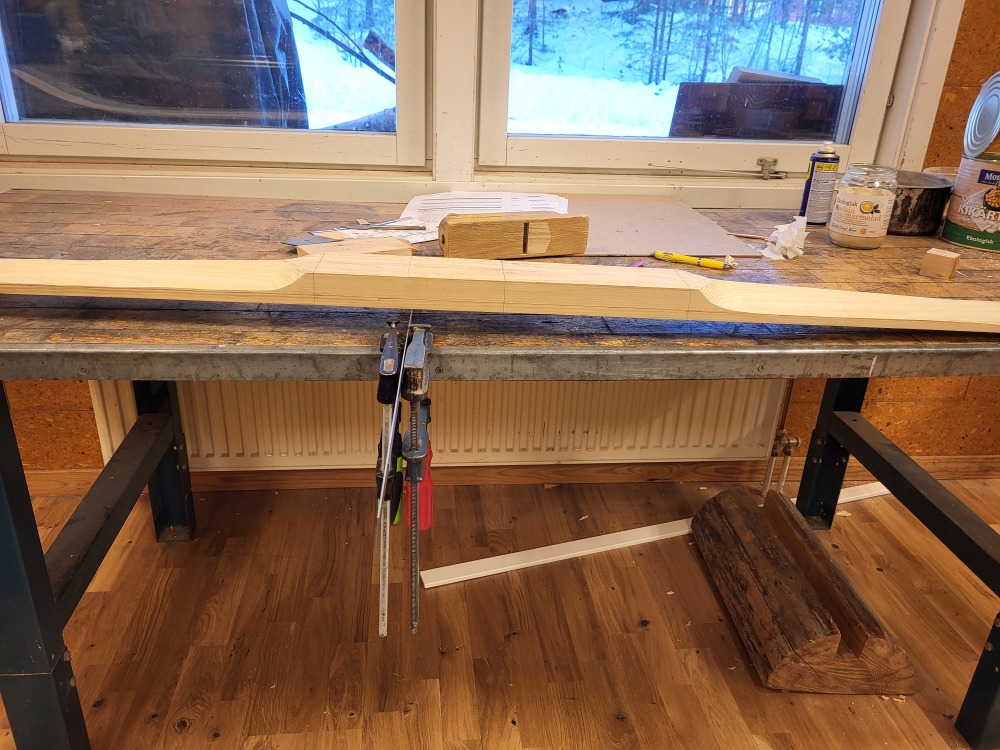
Figure 26: Find point where the ski just about tips back, front up
When I make the hole, I place the hole just in front of the center of mass (which in my case was 11 cm in front of the guesstimated “L/2.3 = 102 cm line”), and just above the “1 cm bottom”.

Figure 27: Drill hole, half way from both sides, plus chisel.
5. Tar and heat
For the ski to not get soaked, and for the snow to not get stuck, I tar the ski, and burn it outside, for excess tar to soak into the wood. What remains I dry off with a rag.
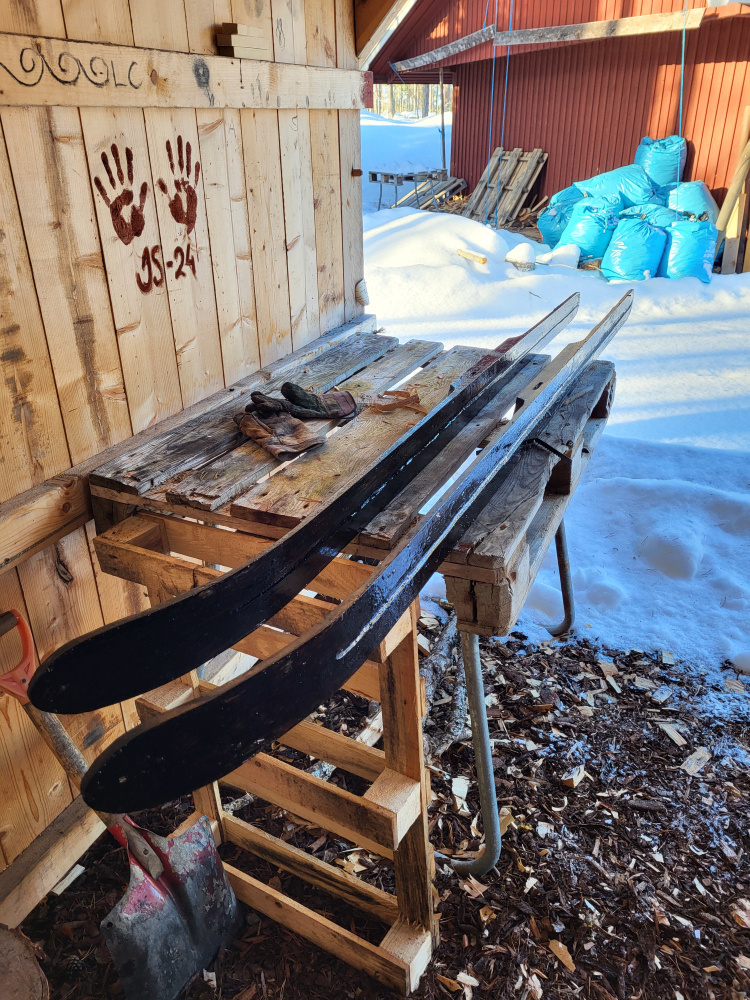
Figure 28: Not in picture, but here I treated them with heat.
Technically, only the underside needs tar, but it is easier to just use the same treatment on the whole ski.
When using the ski we can use old candle stick (paraffin wax), which we also could have mixed into the tar.
6. Bindings
6.1. Historic bindings
Binding on different skies that I can choose from depicted below. Using birch wick(?) (swe: vidja) is a traditional binding that is easy to find material for, and very strong - if done right. I tried my hand at making this, but I feel I need more “practice to make perfect”.
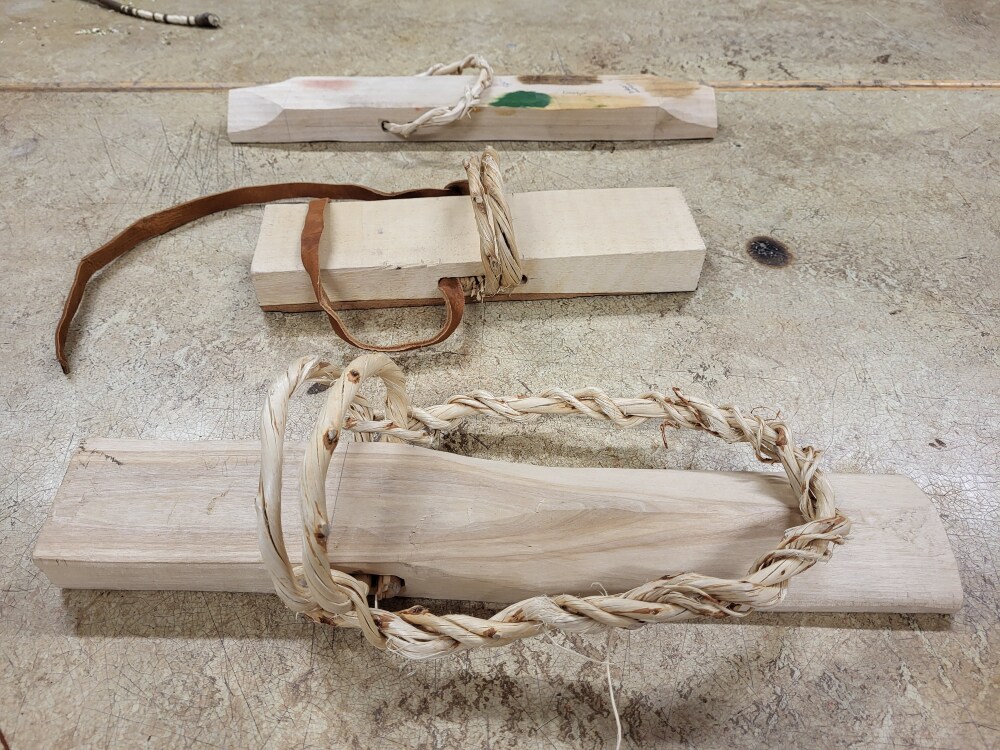
Figure 29: Demonstrating three different ski bindings. Classic being using swe: vidja (birch twisted to unspool the fibers)
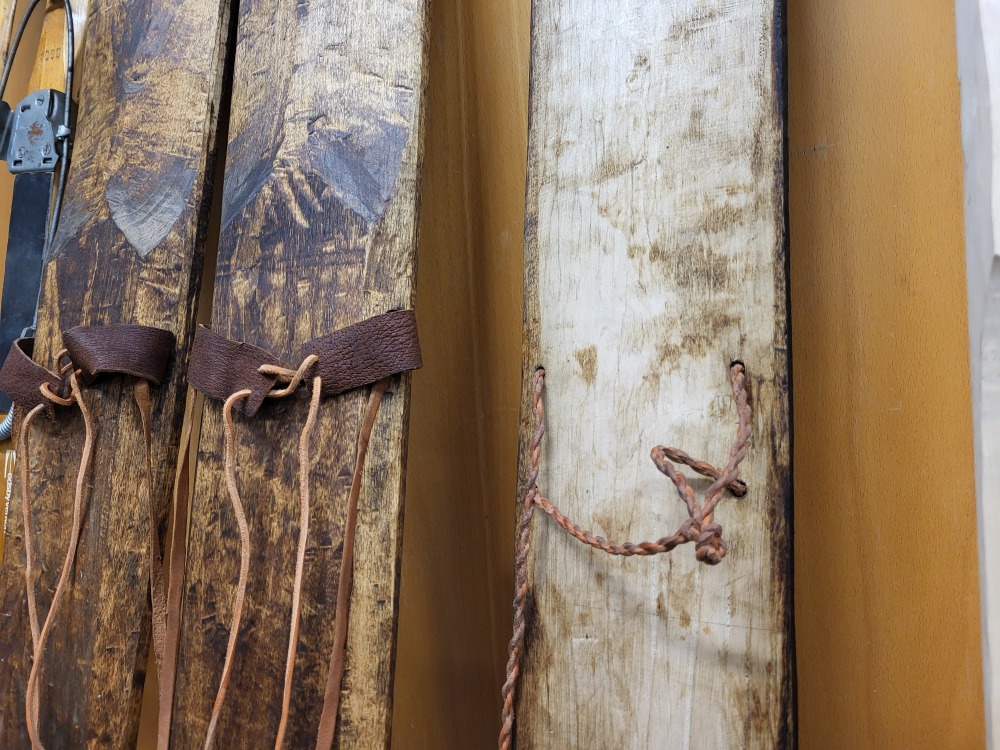
Figure 30: Braided (right) is likely the oldest binding type shown here. It wraps around the back of the heel.
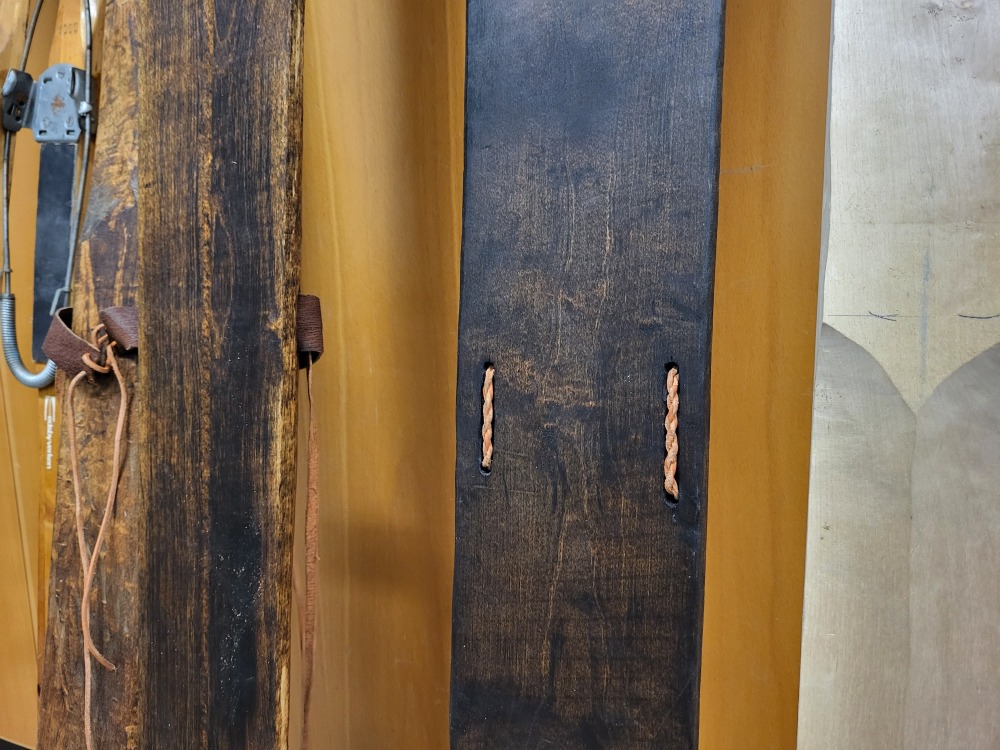
Figure 31: Downside with the braded model is it is exposed on the underside.
6.2. Making our own
I could have used a modern classic like “cable binding”, however, there’s no room in front of the foot plate to attach it, as I had my eye to using even more traditional binding using leather.
Since leather stretches when wet, we use half-tanned (swe: “rårand”, or “halvbarkat”), which is leather that is treated in a tanning bath that has already been used once, thus the tanning substances have been used up, and the center of leather is untanned, and becomes very hard, and unresponsive to stretching.

Figure 32: “Rårand” / half-tanned in water for 24 h such that I can cut out the straps I need.
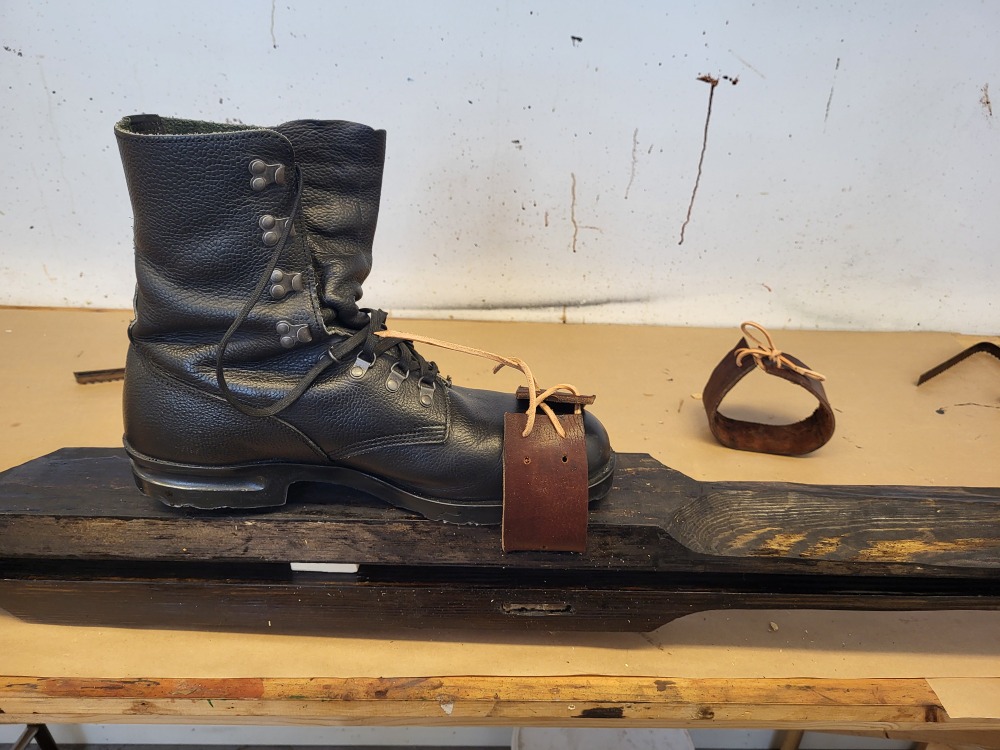
Figure 33: When dry, the toe binding will not move or stretch (much), even when wet.
For heel binding I could use a leather string that is wrapped around the heel and tied in front. At the moment of writing I’ve cut two strings from reindeer hide that I’m twisting together, but that’s not quite finished yet. Below I use an ordinary string to measure how long the leather sting I’m making needs to be.
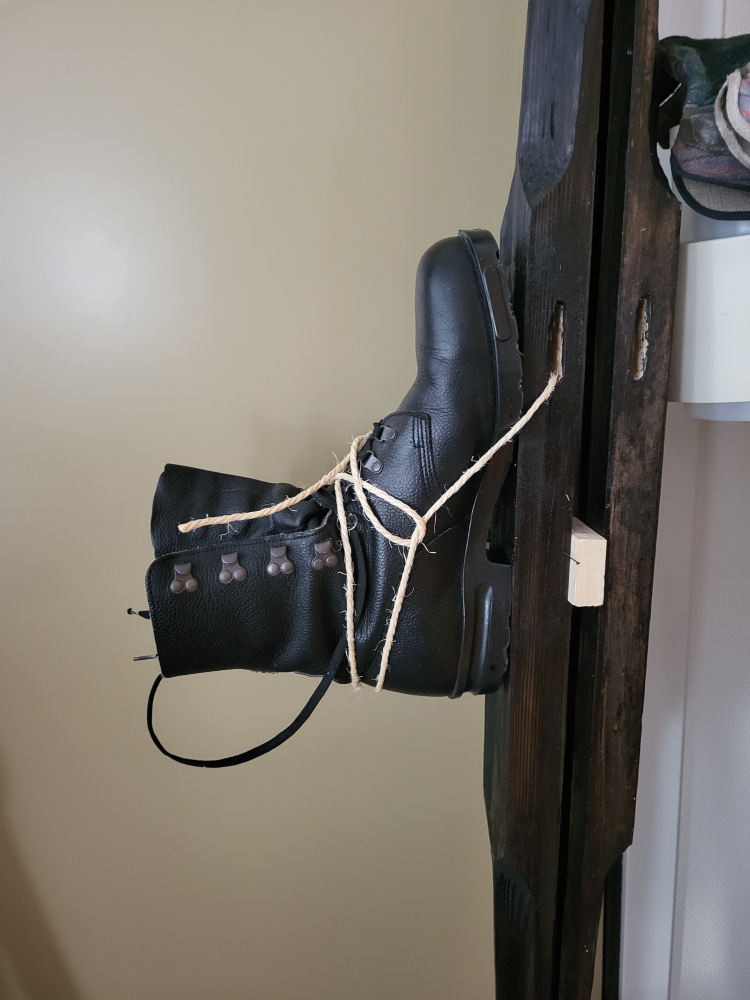
Figure 34: Trying out heel binding (toe binding not mounted).
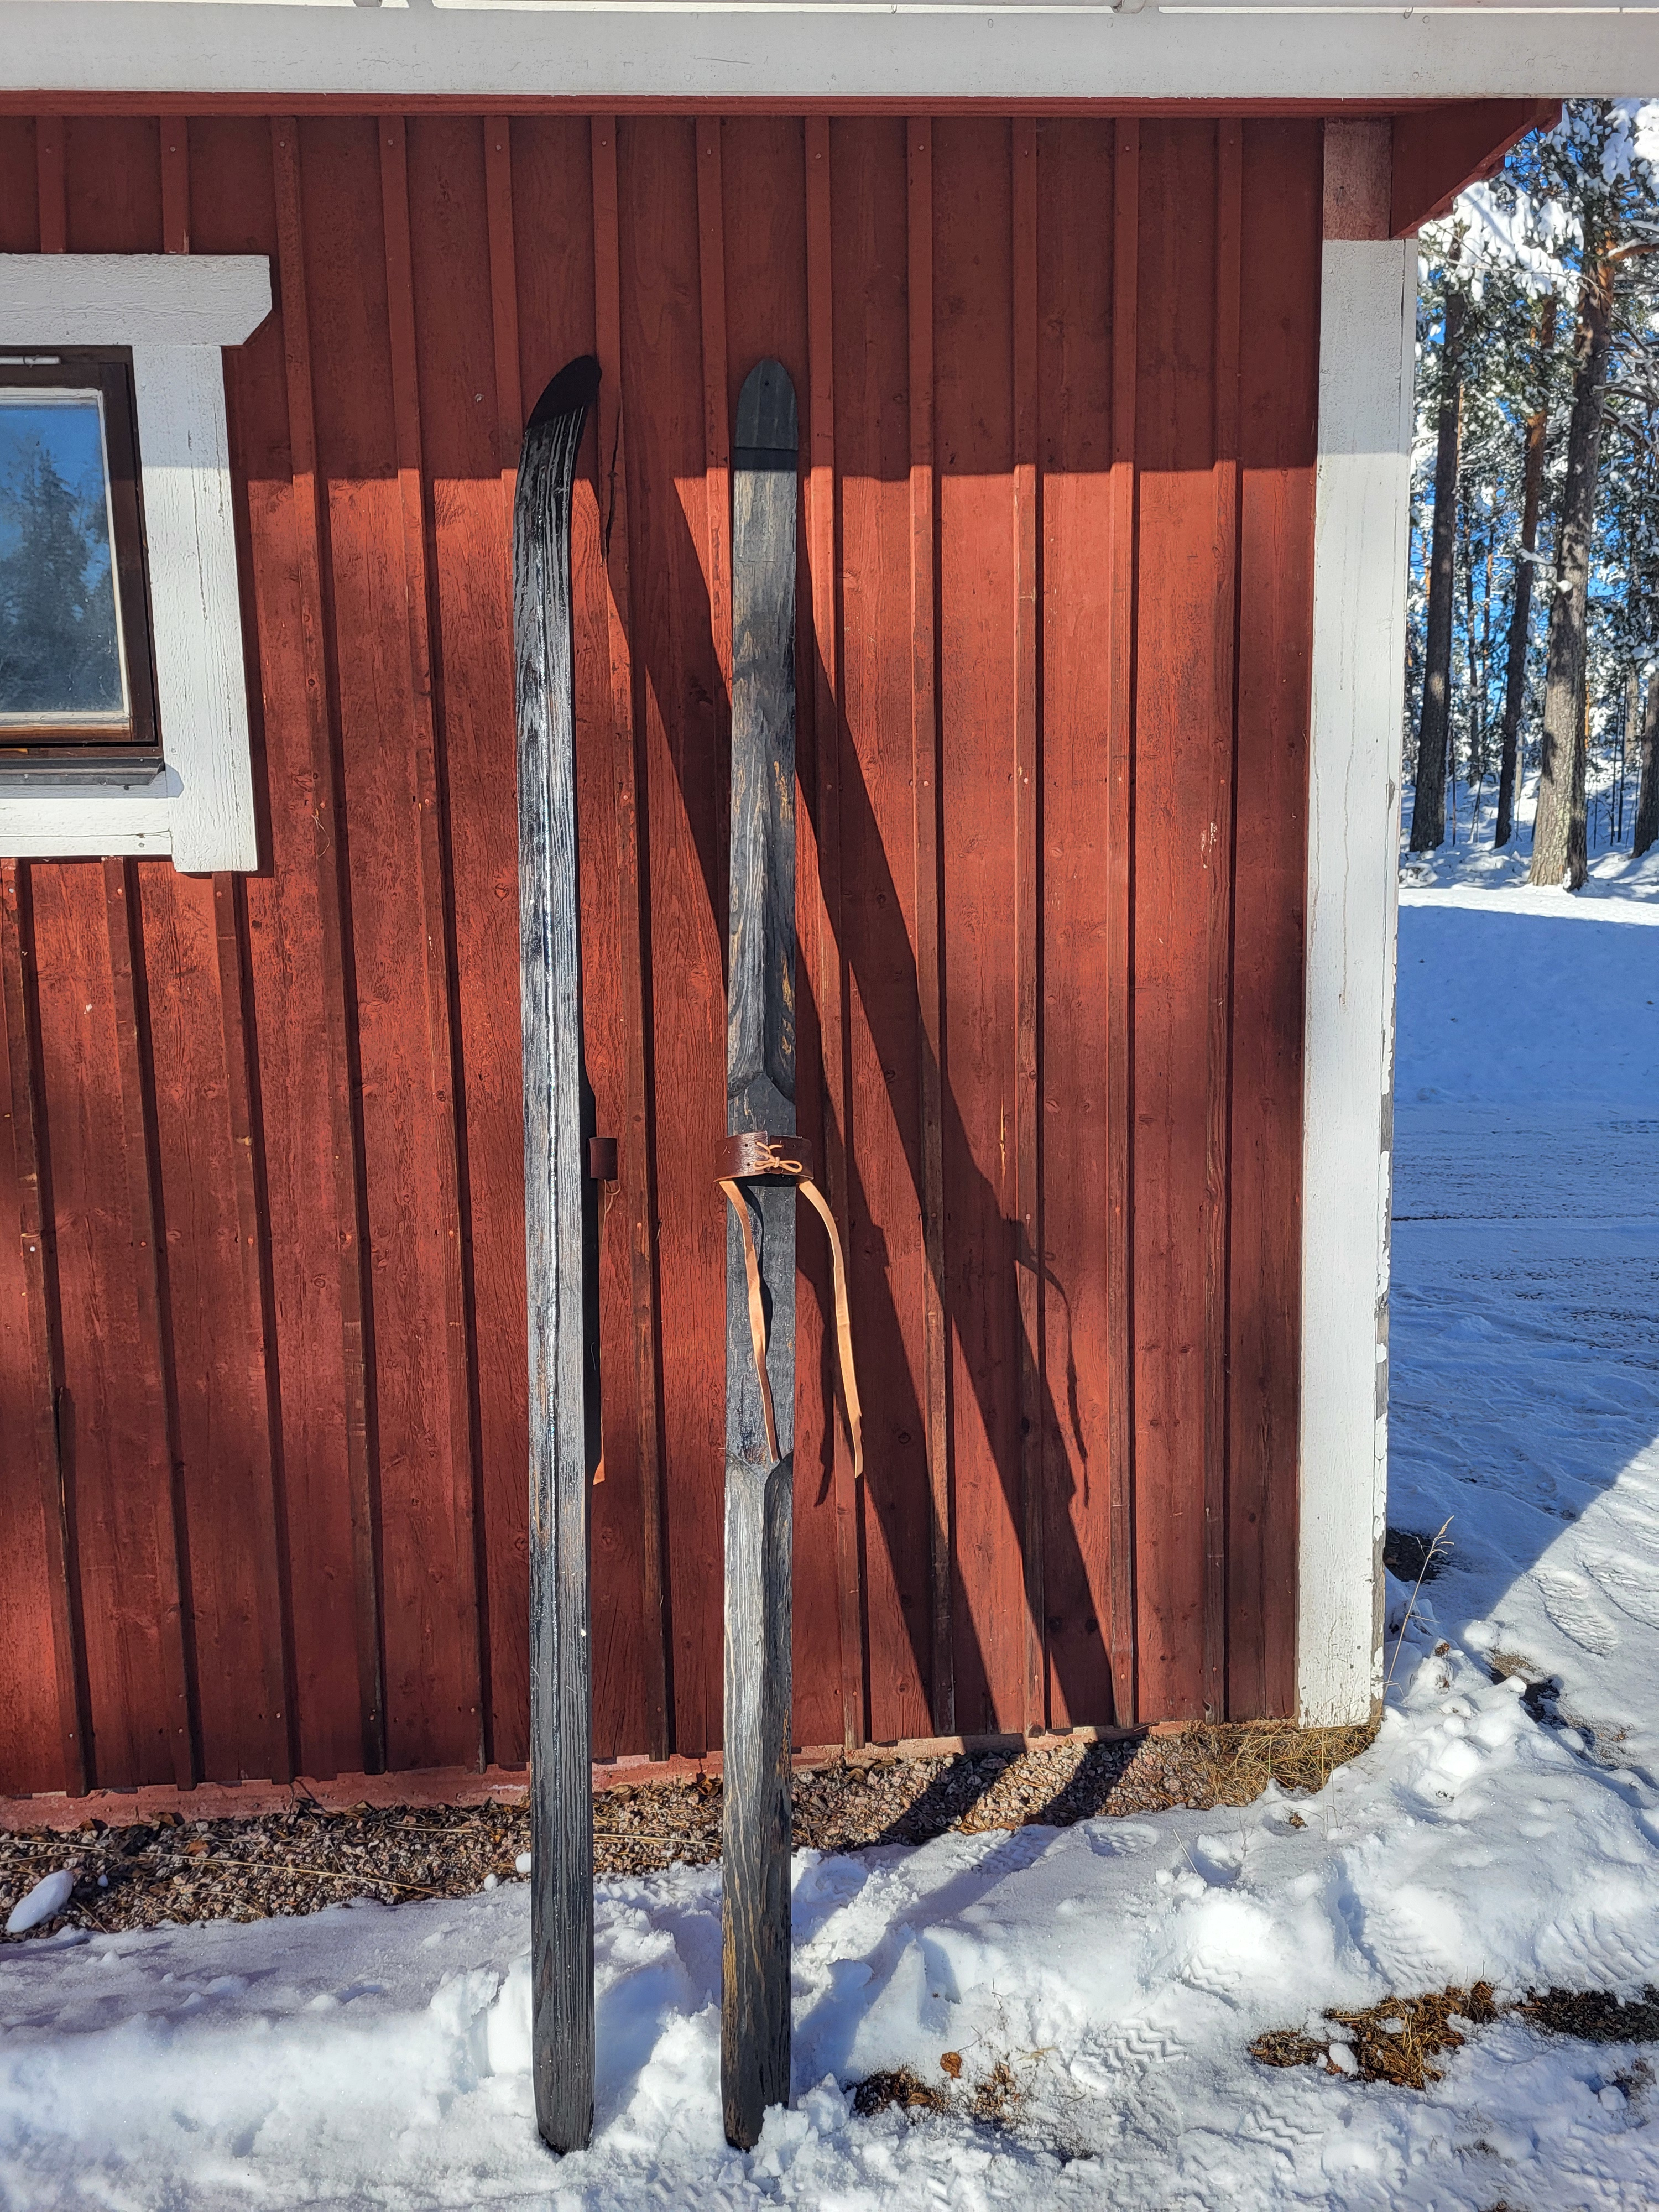
Figure 35: Finished, in the sun for the tar to absorb, and binding installed.
7. Lessons learned
- Prefer radial cut planks (probably very hard to find)
- Have the ridge in front of the foot-plate accept cable binding
- Prefer birch rather than pine, as it is stronger, less prone to crack when bending the tip
- Leave some material in the back above the “1 cm”-line, for planing the end upwards (swe: hyvling & avfasning)
- Possibly leave chunk of wood in tip, for decorative knob
- Go easy with the saw
7.1. Checkpoint: End
Caveat: I started out making my skies in parallel, however, one of them turned out to have a crack (see image below). Since I was ahead of schedule (humble brag) enough to have time to make a third one, I leaped to the task, and this time I documented the process which is the result you’ve just read.
Thus the first two skies I made took significantly longer to make.
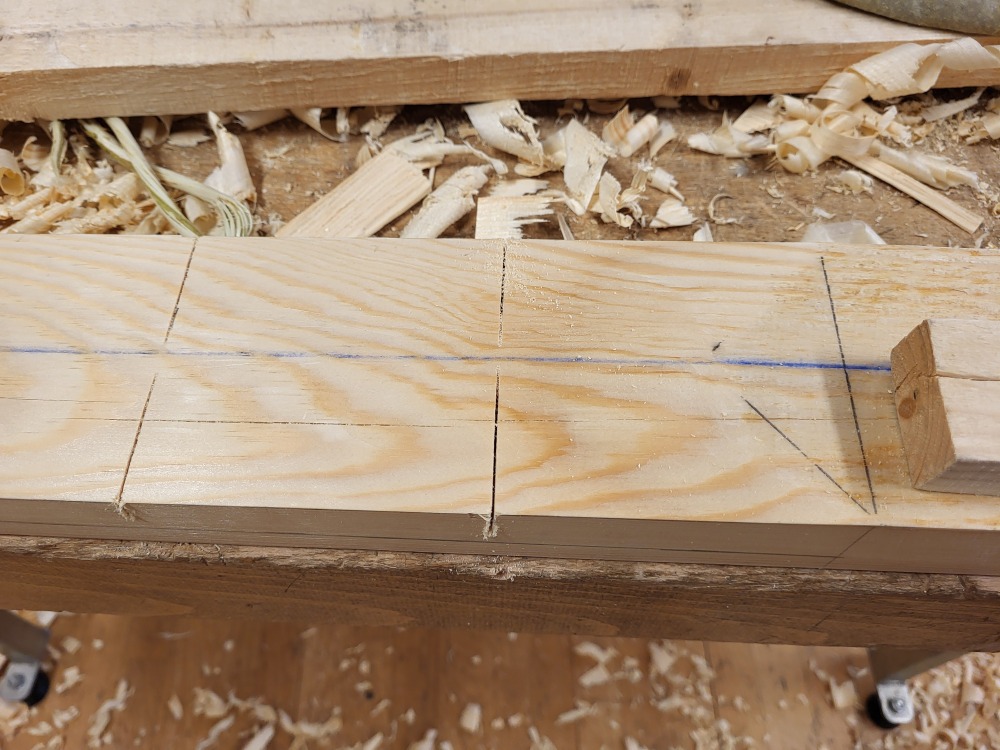
Figure 36: My first ski, cracked.
8. Appendix
Documentaries about traditional ski making:
Ski making in Norway: Skimakaren i Morgedal (1975, Nasjonalbiblioteket)
Sondre Nordheim laga ein skimodell som hadde mykje å seie for korleis skiene seinare vart utbreidde og brukte. Ein skimakar frå Morgedal i Telemark viser korleis ein laga ski på Sondres tid. Frå han går ut i skogen for å finne eit høveleg emne til han er ferdig med skiene, ligg det mykje arbeid som krev stor nøyaktigheit. Det er særleg vanskeleg å få bøygen på skituppane til å halde fasongen. Filmen er laga etter eit manus av idrettshistorikaren Jakob Vaage. (Omtale fra SFS/NFIs distribusjon)
Ski making in Sweden: Skidmakaren i Gielas (1988, SVT)
En dokumentär av Sune Jonsson om småbrukaren, jägaren och fiskaren Alfred Israelsson i Gielas nära Kittelfjäll i Västerbotten. Hans jordbruk är fjällägenheten Gielas, ett husbehovsjordbruk, ett äldre ekologiskt jordbruk, som ännu lever kvar.
Skies in different cultures: Att bäras av snö (2022, SVT)
Ett skidspår i den djupa snön - ett spår som rymmer en mångtusenårig historia. En film om skidor och skidåkningens historia bortom preparerade spår och pistade backar.